
Table of Contents
How to create motive candles? When it comes to creating motive candles, make sure to use the Vybar 103 additive because it is designed for motive candles. How to create motive candles? It’s also important to note that the candle wax you’ll use is specifically made for molded candles. How to create motive candles? You should not use petrolatum as an additive or a Crisco especially if you’re trying to create a motive candle otherwise it would be difficult for you to get the cooled up candle wax out of the molds and you’d end up breaking it.
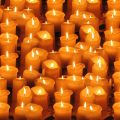
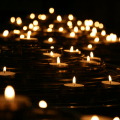
Votive Candle Tips
How to create motive candles? The first thing you need to do is to melt the wax, and prepare the wick. Once it’s all done, you can now line up your candle molds, and pour the melted wax with the properly placed wick in it. Votive candles even if they are quite small in size are also a bit tricky, and you can definitely encounter some problems while making it. Compared with other candle types, you need to pour the wax twice because usually the votive wax sinks after the first one.
The First and Second Pour
How to create motive candles? For your first pour, what you need to do is to fill your votive candle molds; you should leave at least 1/16 inches of unfilled space in the candle mold. Otherwise, the second pour wouldn’t be successful so don’t fill it up completely the first time. For best results, we recommend that you save enough wax from your 1st pour so that the left over can be used for your 2nd pour; 4 pounds of candle wax can create around 32 candles. You can stop once you’ve done the 1st pour with 32 candles so that you can proceed to doing the 2nd pour.
Votive candles can quickly cool up which is why you need to make sure that before it completely hardens, you’ve already straightened and place the candle wick in the center of the molds. Once it’s all done, you can now allow your molded/votive candles to completely harden at room temperature for about two hours. After that, you can now do the second pour. Make sure to do it after 2 hours otherwise, your 2nd pour might sink. On the other hand, if you didn’t do your 2nd pour and it exceeded 2 hours, the effect is that your votive candle will show marks of the 2nd pour.
Pouring Pot
How to create motive candles? Place your pouring pot that contains your first pour left over in the stove, and set it at 160 to 165 temperatures. At this point, it is best not to add any fragrance oils otherwise it could cause the 2nd pour to have a slightly different shade than the 1st pour. After you’ve done the 1st and 2nd pour in all your votive molds, you need to wait for about an hour before you tilt the mold upside down in order to pop the votive – sized candles out. You’re basically done at this point.
If ever you need to create a slightly larger votive candle, you’ll still need to follow the same steps but there are just a few differences. You’ll need to poke a few holes in your large votive candle after the 1st pour is set up in ½ inches to release any air pockets. Larger votive candles will most likely need several wax re – pours depending on how large you want to make.
Color Dyes
How to create motive candles? Diagonal stripes just like the stripe candles are very appealing, and it’s also not as hard to make as you think. You first need to prepare the candle wax and the mold as well as the color dyes. Once the wax is already melted at the right temperature, you can now pour the 1st layer of wax to a depth of 6 millimeters or ¼ inches, and just let it set. Once the layer is set, tilt the mold and secure it.
Begin pouring in the next layer. If ever you want to change the direction of the stripes, what you need to do is to move the angle of the mold when the 2nd layer is set. Once the pour reached the top of the mold, straighten it out before pouring the last layer. Let it completely harden, and remove the finished candle from the mold.
Ice Candle Molds
How to create motive candles? You can get a certain effect once you’ve put ice cubes into the mold. When the candle is popped out of the mold it will usually have cavities. If you wish to achieve a perfect ice candles. The first thing you need to keep at hand is a core handle. You need to color dye the wax, and also cut the appropriate amount of candle wick. The next step is to pour the colored wax into a deep container, and then dip the candle wick into it.
Once you’ve done that, you need to pull up the wick taut, and then just repeat the whole process until you built up a candle that measures about ½ inches or 12 millimeters in diameter. Make some ice cubes and then put it in the candle mold, then pour the melted wax over it. Just hold the mold over the sink so that you can remove the candle.
Creating Mosaic Candles
How to create motive candles? You first need to prepare the mold, and the colored candle wax. You’ll also need a baking try for this one. In order for you to create a mosaic chunk, pour the colored melted wax into an old baking tray. Once the wax is all cooled and set in the tray, you can now break it into chunks. Place the chunks into the prepared mold and ensure that the wick is also placed at the centered.
You can start melting contrasting colored wax; just make sure to not add any stearin so that you can clearly see the contrasting colored chunks. You can use a pale shade of wax. Allow the colored wax to cool around 70 degrees Celsius. Make sure that the colored wax is not too hot when you pour it otherwise it can melt the wax chunks. You can slowly pour the wax in. As you pour it in you can see how the chunks bind together. Once it’s all done, you can then remove the hardened candled from mold.
Creating Tinfoil Candles
How to create motive candles? You need to cut some strips of tin foil and then crumple it. Once you’ve done that you can place it in the mold and then pour the melted wax in and add color dye. Don’t add stearin otherwise you won’t see the thin foil; the goal is to see the transparent effect. Once it’s all done, you can then remove the hardened candled from mold.
Creating Sand Candles
How to create motive candles? You’ll obviously need a sand to do this type of candle. Place clean and a bit damp sand in a small bucket, and then make any sand shape you like. Once you’re satisfied with the shape, you can now pour the melted wax into the sand. You need to allow the wax to set in, and once it does you can now remove the candle from the mold. You need to create a hole in the sand candle using a hot skewer so that you can insert the wick. After doing that you can now fill the gap between the candle wax and the wick.
Push the bag into a glass jar, and then let the top of the bag hang up around it. Melt the candle wax and turn off your heat source once the thermometer registers 80 degrees Celsius. Let it cool until you see a scum form on its surface.
How to create motive candles? Once you’ve done that, you should now slowly pour the melted wax into the polythene bag, and then allow it to cool. When the wax is still pliable, you should remove the bag from the jar and carefully slip a rubber band on the top. This way you can mold the bag with soft wax, and shape it up in any way you like. Put the bag into the cool water so that it can completely harden up. Once you’ve done that, you can now release the candle by simply removing the rubber band, and tear away the bag. Finish the candle by inserting the wick.


 I love to write books about family, dating, household, and healthy living. My books are written for everyone in an easy to read and understandable style.