CHAPTERS
Navigate to chapter
► Chapter One: Basic Ingredients Used in Soap Making
► Chapter Two: Swirled Layers and Embedding with Melt and Pour Soap Base
► Chapter Three: Double – Pour, Four – Pour, Morphing and Fading Techniques
► Chapter Four: Advanced Melt and Pour Techniques: Clam Shell Soap and Candy Soap
► Chapter Five: Cold – Process Soap Making Basics: Ingredients, Lye Water and Saponification Process
► Chapter Six: Cold – Process Soap Making: Fragrance Oils and Colorants
► Chapter Seven: Packaging and Selling Your Soaps!
Introduction to the Art of Soap Making
There are 2 types of hygienic soaps. The first one is made out of lye or sodium hydroxide which is solid, and the second one is made out of potash or potassium hydroxide which is usually soft and liquid. Soaps made out of potash are the commonly used soap making ingredient back in the day because people can extract alkali material from wood ashes before cooking it oven an open fire along with animal fat. Old – fashioned soap – makers and pioneers store the homemade soaps in ceramic rocks and boxes and use it when necessary. Historically speaking though, lye also refers to potash but true lye (made out of sodium hydroxide) is already a modern chemical that’s now commonly used in making soaps particularly the commercial products because it needs an industrial setting since it’s quite dangerous due to high alkaline content. In fact, lye is often used in murder dramas and crime shows due to its ability to digest human and animal tissues. A single drop of lye can easily burn the skin and even cause eye damage if it’s not immediately washed away. Due to the potential danger of the ingredients, it’s very important that you learn the materials used in soap – making before you try it out. This book will guide you on how you can properly and safely create soap.
Basic Soap – Making Techniques
Before we get into the details of the different methods of soap – making, it’s also essential to know what soap is from a chemical perspective. According to crafts experts, soap is the product of a basic chemical reaction produced by lye and fats/ oils. If you carefully choose the right combination of ingredients such as fragrance, colorant, essential oils, and other products, you can create a charming product that has its own ‘flavor’ or ‘character’ that even commercial soaps cannot compete with.
Here are the four basic methods of soap – making:
- Melt and Pour: This is the easiest technique of making soap because all you have to do is to pretty much melt the pre – made blocks of soap in order to add your own set of ingredients/ fragrance.
- Cold – Process: This is the most common technique of soap – making from scratch using lye and oils.
- Hot Process: This is simply a variation of the cold – process technique where soaps are cooked using an oven or a crockpot.
- Re – batching: This is a method where bars of soap are being grinded and re – blended with water, milk or other ingredients.
Pros and Cons of Soap – Making Methods
Each soap – making technique has its own variations as well as pros and cons. Through reviewing the two most commonly used methods which are melt and pour, and cold – process can help you choose which process best suit a beginner like you. This section will give you an overview of the two major techniques used in making soaps.
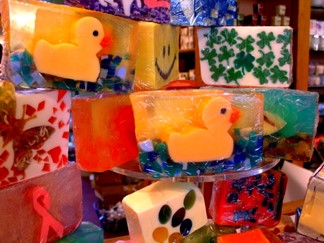
Method #1: Melt and Pour Soap – Making
Making a soap using this method is similar to creating a cake with a cake mix already. All you have to pretty much do is to “bake” it. This is why it’s a perfect method for beginners like you since you won’t really need to mind the basic soap ingredients and customization of the recipe – you simply just melt and pour because the hard part has already been done for you. It’s easy, convenient, and safe to do.
If you use the melt & pour technique, you just need to buy pre – made blocks of soap that are usually uncolored and unscented. You can get soap base from a supplier or craft store near you. The process involves melting the soap base using a double boiler or your microwave. Once the soap is thoroughly melted, you can then add your handpicked charms like colors, scents, and other additives you like.
Once you’re done with that, you can put the melted soap in a mold and wait for it to harden for a period of time. Viola! You’re done! Easy right? We’ll discuss more about this method in the upcoming chapters. For now check out the materials you’ll need as well as the pros and cons of this technique so that you’ll have an idea:
Materials:
- Tabletop or any clean workspace
- Double boiler or microwave
- Heat bowl for the microwave
- Whisks and spoons
- Pre – made block/s of soap base
- Measuring spoons
- Scented fragrance, soap colorant or other additives you like
- Soap molder
Pros and Cons of Melt & Pour Soap
Consider the following:
Pros:
- Easy to do and a very cheap way to create your own soap
- You don’t have to mix the lye chemical which can be dangerous
- You just need basic ingredients to complete the process
- You don’t need a lot of materials
- It’s a ready – made soap that you can use as soon as it hardens
Cons:
- You have no control over the ingredients used in the pre – made block soap base
- This method is not as natural compared to other techniques since most soap base manufacturers already added chemicals to make the soap much lather or to better allow it to melt
- Your end product is only as good as the soap base you will buy
Method #2: Cold Process Soap – Making
If the first method is similar to using a cake mix and just baking it, the cold – process technique is basically creating a cake or in this case, a soap from scratch. This method is for crafty people who already had some experience in creating a basic soap or those who wanted to have control over the ingredients used in the soap base. The advantage is that it’s up to you on what goes into the pot and you can also make the content as natural as you desire. However, the set- up and process is quite complicated compared to the melt and pour method, and you may need to learn basic techniques of soap – making before you try doing this (which we will cover in this book).
Continue Reading…
Want to read the entire thing?
